Twitter Facebook RSS

Showing posts with label desserts. Show all posts

Tuesday, August 13, 2013

Hello!!! 


Holy moly, it's been too long. This was the longest break I have ever taken from blogging, actually thats a lie. I am pretty sure I took longer breaks. Through the time away from home (meaning here) I have been collecting a lot of memories with my new Panasonic GX1, equipped with a 20 mm "pancake" lens. Yes, getting very technical here. I don't even know what half the stuff means. I literally just got it two months ago or so and I love it!

It's has taken me quite some time to think about what to post because my summer has been filled with nothing but weddings. I know most of you must have been frustrated with the lack of posts from me. So here I am and what I want to post about is my latest macaron adventure.

I always get so many "likes" on Facebook and Instagram (if you haven't subscribed or followed, please do so by clicking on the link above) for the macarons that I bake. No matter who you are or where you are from, I find that these little baked goods are always enticing.


After baking over a thousand of these babies, I noticed some important kitchen essentials you need to bake the perfect macaon.

You will need:

  • A silpat baking mat
  • Industrial cookie sheet 
  • Patience

The Silpat and industrial cookie sheet really does make a huge difference. It allowed me to bake the cookies for fifteen minutes!


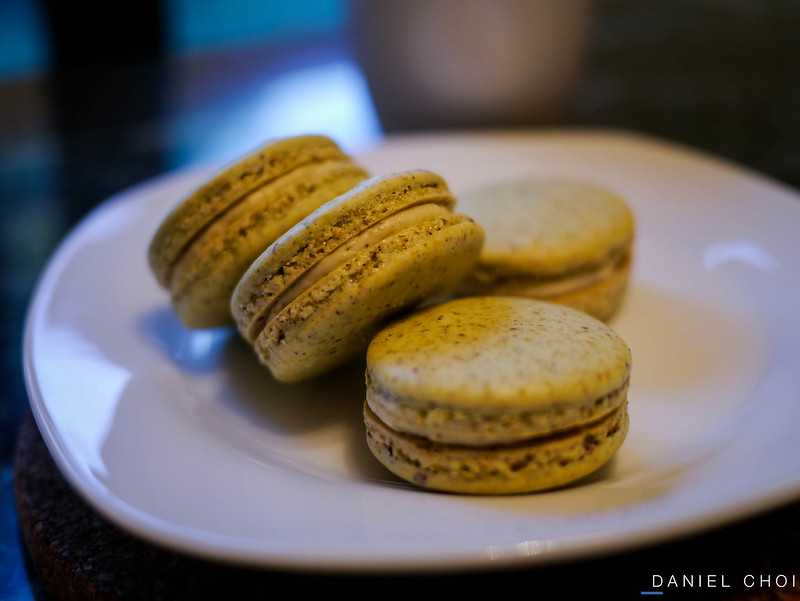
The end result is what you see above and here is what is in the Pistachio Macaron with Pistachio Ganache:

Shell:
115 g icing sugar
75 g grounded pistachio
2 large egg whites
50 g caster sugar
a pinch of cream of tar tar
a pinch of salt

Basically, you just replace the ground almonds with ground pistachio.

Ganache
150 g 35% whipped cream
150 g white chocolate
25 g pistachio paste

Use the double boiler technique to melt the white chocolate. Set a side once done.
Bring the cream to a boil and mix in the paste.
Pour the chocolate over the whip cream mix. Use a hand blender and blend for 10 minutes.
Set in the fridge until the ganache thickens, roughly around 1.5 hours.
When ready, pipe the shells and you are done!

There you have it, short and sweet. Until next time!

Monday, June 3, 2013

Final product. 

Alright, I'll admit it. I disappeared for quite a bit and you have every right to be mad at me right now for not posting anything. The Amy's Baking Company was a good filler though, you have to admit it. Most of you probably deleted my blog from your bookmark tabs but let's just be friends again, slowly.

So the reason for my disappearing act was because I had a huge macaron order to do. My sister and I baked over 570 macarons, yes, five hundred seventy macaroons for my friends wedding.The whole process took about 3 months. It started off with just an idea but turned into reality when I convinced them that it was well worth it and it was!

I am still pinching myself while carrying a big smile on my face, remembering the look on the groom's family's faces when they saw the final platters of macarons delivered. They were in disbelief that it came from my kitchen and frankly, I was in dismay myself too. I am going to try my best to just pack all these months of brainstorming and taste sampling into a short post, since we all had ADD here, well, at least I do.


The recipe, I am not going to post so just refer to my previous posts. First and foremost, I want to give credit to my good friend Calvin Lee for helping me take some pictures during the process. He is an awesome photographer and friend, please check him out. My sister deserves a shout too for helping me out in the biggest possible way, I couldn't have done it without her.

Challenges
I guess I'll first talk about the challenges during this whole process. One thing that I cannot defeat is my inner voice, it keeps telling me that I am going to fail and let the newly weds down. I felt very down and was stressing myself out. I couldn't do anything, all I thought about was macarons and the feeling was insane. I woke up, went to work and was looking forward to going home just to bake. So, number 1 rule from now on, drown out your inner voice that tells you, you are going to fail.

Second was the timing of all these baked goods. My trusty old man kept on telling me to stop making small batches and just devote a couple of days to bake the whole day. Having this mentally made it worst and it just freaked me out knowing that if I failed, the wedding would be ruined. But the old man was right in the end and it actually had a lot of beneficial factors to it. Colour's were consistent, saved energy and production was more effective.

Third was a lack of sleep. I went through a week of poor hours of sleep. My day would start off with work, gym, dinner and then macarons. I had to share the kitchen with my sister and we took turns, I always seem to get the grave yard shift but it didn't matter, I was driven and would do anything to be successful.

Pros
Ah fine, Ill admit it. This macaron journey has really been a special bonding experience. My sister and I spoke the same language for once and it was for the love of perfect macarons. We discussed many tips and even compared notes. It was beautiful and for sure, we will do it again. I asked.

Seeing the happy faces of friends and family was just priceless or maybe they were shocked for the fact that the macarons were made by me and my sister. Overall, the image of guests happy faces were amazing and of course how can I forget about the bride and groom. They were more then grateful. I was so happy that they loved it and for the fact that they believed in me.

After all the countless failed batches, I finally mastered the macaron and I can now make the macarons work all the time! Now I just got to figure out what am I going to do with the rest of the extra macarons I have. Do you guys want some?

Backup Plan
There was no back up plan.


I think that's all I have to share for now. Let's try to keep things short and simple for the both of us. Here's a mix of my journey. Take a look!


Waiting for the skin to form is the best part because you do nothing.


Quality control

Wasted and burnt macarons. 

Feet

I love the smell of a fresh batch

Two A.M. and still finishing up on a work day. 

So Pink. 

This was only 234 macarons. 

Calvin took a break from the assembly line.
Overall it was a crazy experience, filled with ups and downs. But in the end, it was well worth it. Macarons just give a big smile to everyone's faces, no matter what age group you are in, they are a dessert for anyone with a sweet tooth.

If you like what you see, leave a comment below and of course, feel free to place an order. See you soon! 

One last shot. 

Wednesday, February 27, 2013


Happy Snow Day??

Yes!!! Let it snow, let it snow! Outside is looking pretty ugly right now with all the snow and freezing rain. I do not know if I will be at work but by the time I post this, it wouldn't matter. Which ever it is, it's going to be a beautiful day and no matter what happens I am glad.

I had such a wonderful weekend, I need to share this joy and positive energy with you. I had a little retreat with some buddies of mine and we ventured to Blue Mountain Ski Resort. We had such a blast boarding down the great hills and spending some quality time over fast food. Yuck, I know.

We did manage to share some favourite desserts we like and that inspired me to bake a batch of these babies. The original recipe is from the one and only Jamie Oliver. And of course, these are safe and I tweaked them a bit.

Here's how it goes:
1 cup unsalted butter 
7 oz Cadbury's Dark Chocolate (broken up)
1/2 cup nuts of your choice 
3/4 up cocoa powder
1/2 cup all purpose flour
1 tsp baking powder
4 large eggs
1/4 Baileys Irish Cream
1 3/4 cup sugar

Pre heat at 350F

Using the double boiler technique, melt the chocolate and butter together until smooth. Add the nuts. Set a side to cool and add the Bailey's.

In a separate bowl, mix together the cocoa powder, flour, baking powder and sugar.

Then add the dry mixture to the chocolate. Using the paddle attachment, stir together well. Beat in eggs one at a time and mix until you have a silky consistency.

Pour your batter onto a 12 inch lined baking pan and bake for 30 minutes. You want to aim for a bit of a hard crust but still gooey on the inside.

Allow it to cool in the pan and transfer for it to a chopping board. Cut into chunky squares and enjoy.


I shared these goods with my coworkers and they all loved it except one. She said she wanted to puke. Probably because of the alcohol or maybe she hates me or hates brownies. The possibilities are endless but the most important thing is, I got my chocolate craving satisfied.

For the rest of this post, enjoy some pictures from my trip to Blue Mountain.

Cheers!


Tuesday, February 19, 2013


Hello, hello!

Finally the long weekend is over and that only means one thing. Work. That sucks! But the good news is, we have a shorter week! Haha. Anyways, Happy Belated Valentines Day! I made these hard to resist cupcakes for the holiday. Is it a holiday? I am not sure. I don't think so.

I thought about celebrating but then again who celebrates that day anyways. It always seem to be like a contest of who gets the most flowers or attention on that day. Not a big fan. But I was feeling extra happy and nice, so I decided to bake these babies for my love ones.

This recipe was inspired by Food Network's Cupcake Wars 2010. I love how this recipe never ceases to fail me in any way. It is so straight forward and easy. Give it a try! =D

Ingredients
3 cups plus 3 tablespoons all-purpose flour
1 1/4 teaspoons baking soda
1 1/4 teaspoons kosher salt
1/4 cup unsweetened cocoa powder (recommended: Valrhona)
1 cup vegetable oil
1 cup milk
1 7/8 cups sugar
3 eggs
60 ml Bailey's Irish Cream
1/2 cup plus 2 tablespoons unsweetened applesauce
1 1/4 teaspoons apple cider vinegar
1 1/4 teaspoons vanilla extract

Directions Preheat the oven to 350 degrees F. Line 2 muffin pans with 24 cupcake liners.

Sift together the flour, baking soda, salt, and cocoa powder in a medium bowl.
In the bowl of a stand mixer with a paddle attachment, mix the vegetable oil, milk, Bailey's Irish Cream, sugar, eggs, food coloring, applesauce, vinegar, and vanilla on medium speed until incorporated, about 2 minutes.

Turn the mixer to medium-low speed, and add the dry ingredients a little bit at a time, making sure to scrape down the sides of the bowl if necessary.

Mix until just combined.

Fill the cupcake liners 3/4 of the way full, and bake until a toothpick inserted in the center comes out clean, 20 minutes. Cool the cupcakes completely.

Generously frost the top of each cupcake with the Almond Cream Cheese Frosting.


Almond Cream Cheese Frosting: 
11 1/2 tablespoons butter, at room temperature
24 ounces cream cheese, at room temperature
4 1/2 cups powdered sugar, sifted
3 teaspoons vanilla extract
1 1/2 teaspoon almond extract

In the bowl of a stand mixer with a whisk attachment, whip the butter and cream cheese on high speed until light and fluffy, about 3 minutes.

Turn the mixer on medium-low, and slowly add the powdered sugar, vanilla, and almond extract. Once the ingredients are all incorporated, turn the mixer to high, and beat for 1 additional minute.

Monday, January 21, 2013


Hello

Before you ask me where I have been and why I haven't been posting. I just want to come clean and say I have been busy with life. I know, I know, I always open with I'm so busy with this and that but it's true. =( But I am happy to be back with a new post.

Since I have been baking so many meringues for parties and birthdays I wanted to extend the idea of meringue and fish for some fresh techniques on how to be a bit more creative with it. I was looking through my cookbooks and came across a recipe by the guys at Oliver & Bonacini. They always have a good sense of taste and lifestyle of food that I love.


I came across this meringue with ice cream and marinated strawberries recipe that I really wanted to try.

Here how it goes:
Meringue
4 egg whites
3 drops of lemon juice
2 ml vanilla extract
300 ml sugar

Strawberries
4 cups of strawberries cut in half
125 ml sugar
5 ml lemon zest
50 ml vodka of choice

Served with ice cream or yogurt.
Pre heat at 220F

Place the egg whites, lemon juice, and vanilla in a mixing bowl. Whip until stiff and gradually add sugar. Continue beating until it forms peaks.

Then use a pastry bag and pipe the meringue into 2 inch squares on a baking sheet lined with parchment paper.

Bake until it is dry and set aside. (Around 20mins)

Combine all the ingredients in a bowl and let the strawberries sit for 10 minutes.

After when the strawberries are marinated, place a meringue square on each plate and top it with a scoop of ice cream or yogurt. Press gently to create a cup and fill it with strawberries. Cover with another square and then repeat the process.

The beast within. *gasp

I hope you enjoyed my last post on macarons, I am still trying to adapt to a new book that I got. The macarons are tough, I still need to practice more and get use to the macaronage stage. I will continute to update you guys when I get the chance but for now, thanks for stopping by. =)

Cheers

Sunday, December 30, 2012


Hello!

Happy holidays guys! Oh my, I am so sorry, I have been falling behind on my posts and left you in the dark for so long. No worries, I have been very busy in the kitchen baking and cooking up a storm. I always try to live life first, then blog so bare with me. =) Let's see...where to start.

If you live in Toronto, chances are you heard of Winterlicious. It's basically a way for local restaurants in Toronto to promote themselves by giving a set price for a set menu. I decided to use that idea and start a winterlicious event at my place. My friends obviously loved the idea and wanted in on the action. I looked through some of my favourite cookbooks to gain inspiration and kind of put my own twist to it.

So here we go.


This is the Carrot and Pear Puree Soup. At first glance, it may look like your typically squash soup with toast but looks can be deceiving. In this soup there are:

5 carrots (peeled and chopped)
5 pears (peeled and cubed)
1 L of veggy stock
1 sweet onion
10 ml cinnamon
1 generous gulp of olive oil
30 ml ginger
salt and pepper

With a generous amount of fresh ingredients you want to start off by sauteing the onions with olive oil. Add the cinnamon and ginger. Making sure the onions don't brown. Then add the carrots, pears and veggy stock. Season with salt and pepper. Bring it to a boil then simmer until the pears and carrots are soft. When you reach to that point let it cool down a bit and then transfer the soup to a blender and puree the ingredients.

Then serve with a toasted french bread of your choice. If it tastes a bit bland, add salt and pepper to adjust the flavours.

This soup is perfect for a cold winter's night, especially when you are in Toronto where the harsh winds can really take you off your feet.


Next we have the Roasted Chicken with Cherry tomatoes and Asparagus. I always loved working with chicken, I find that chicken is almost like the default meat for any restaurant because you can get so creative with it in so many ways. My dad gave me some good pointers on how you prep the chicken and I felt bad if I didn't listen to him since he was more excited then I was about the party. And trust me, I was pretty stoked. =)

6 chicken breasts
36 halved cherry tomatoes
11 asparagus
salt
pepper
olive oil
thyme leaves
rosemary leaves
topped with balsamic vinegar

Season the chicken breast with olive oil, salt, pepper, thyme leaves and rosemary leaves. Add the cherry tomatoes, asparagus and spread it evenly. Making sure it covers the top and bottom of the breasts. Let it season for at least half an hour.

Heat up a iron cast pan and sear the chicken skin making sure you get that nice golden brown tone but not to the point where its going to burn.

Preheat the oven at 400F, place the chicken breast along with all the seasonings in the middle of the oven and let it bake for 30 minutes. When it is done, top it off with balsamic vinegar. Serve with choice of veggies or Garlic Mash Potatoes.


Dessert was a no brainier, with the cold weather not going away and old man winter knocking on the door. I wanted to leave my friends with a warm feeling. The Fruit Crumble was an excellent way to end the evening.

2 lbs of fruits of your choice
250 ml all purpose flour
125 ml melted butter
10 ml cinnamon
10 ml nutmeg
125 ml brown sugar

Preheat the oven at 350F.

On a oven safe bowl, scatter your fruits and season them with nutmeg and cinnamon.

Combine the flour, brown sugar and mix in the melted butter. Use your hands to make sure all the ingredients are incorporated properly.

Spread the combined dry ingredients on top of your fruits, making sure it covers all the fruits. Toss it in the oven and bake for an hour until the juices of the fruits start to bubble on the side of your bowl. Serve with whipped cream or choice of ice cream.


Ah, 2012 is coming to an end fast. What are your plans? I can't wait for 2013 to come. It is going to be such a fun and amazing year. I will definately have more dinner parties and share with you more recipes!

Cheers and thanks for stopping by!

Monday, December 10, 2012


Hello Hello

Good morning to you, I hope you had a wonderful weekend. It's been such a hectic weekend with all the Christmas fiascos. So many bright lights and so many people at the mall. Fortunately or unfortunately, there is no snow yet and I am a bit sad since Christmas day is just around the corner. Oh well, it will come.

For those of you who don't know me quite well yet, I am a huge fan of baking meringue. When ever I bring this baby out to the dining room table, I get all these stunned looks and questions about "what is that?!" Haha.


It was a recipe that I found off of Jamie Oliver that got me started. His way of baking meringue is so simple and leaves a lot of room for you to play with. He was the only person that I ever got around to believing that meringues don't have to be crunchy and can be a little bit gooey chewy on the inside.

Although no one really likes him, he was the first person that I ever bought a cookbook from. Probably because it was on sale or something. Haha. If you want to check out his book I would suggest "Cook with Jamie."  


I get a lot of questions regarding when to know when you meringue is ready for baking. The answer lies in the stiffness of your meringue. Turn your batter upside down, if it falls off then it is no good.


Happy Birthday Drew!

Here we go Ultimate Fruit Meringue:

Meringue:
6 egg whites
1 cup plus 5 tablespoons of sugar

Toppings:
500 ml 35% cream
2 tablespoons of icing sugar
10 ml vanilla extract
Handfuls of strawberries, blueberries and fruit of your choice.

Preheat 300F
Whip the egg whites till it starts to foam. Gradually add in the sugar until it starts to turn glossy white. Whip it for about 7-8 minutes until it is stiff enough for your to hold it upside down above your head and won't fall down (It never fell on me ever haha).

Optional:
You can add in any flavours you want to enhance the meringue taste by adding lemon or orange zest.

Pour the meringue batter on a prepared baking pan either as one big round blob or several blobs on the pan.
Bake in the center for about an hour until the outside is crispy and the inside is still a bit gooy and chewy.

Take it out and set aside to cool.

Whip the 35% cream, add vanilla extract and sugar until it starts to come together. Do not over whip or the cream would turn chunky and you do not want it to be like that.

Assemble your cake by putting the whipping cream on top, shower the cream with a handful of fruits of your choice. You can additionally garnish your cake by add crushed walnuts, small mint leaves and if you are feeling very fancy, caramelized sugar would be a great choice.

Eat immediately!


Tuesday, December 4, 2012


Hello hello!

Finally a post of some sort, sorry for being absent today. I had a crazy fun filled weekend and this dessert actually took longer than expected. Boy, am I glad to be back blogging and talking to you guys. Where to start, where to start. Ah, chocolate was on sale at No Frills these past few days. Boy, was it hectic or what. No Frills is having a massive one dollar item sale and it was jammed packed. I hate finding parking but I usually have one rule when finding a spot. Park as far as you can from other cars. You do not want to come back to find a missing door handle. Yes, that's right you heard me, a missing door handle.


So anyways, today I had a conversation with a stranger. He started to ask me about this book I was reading. The book is called The Power of Now and its one fantastic book. I couldn't put it down, I found myself drowning in the information and insightful thinking of the author. We talked mostly about the book and how it affects our lives and such. It was a cool experience.


Back home I finally got a chance to put together the dessert called Banoffee. This was adapted from the book chocolate by whitecap. Basically this is made out of graham crackers, sliced bananas, caramelized condensed milk and melted chocolate. Here's how it goes.

Banoffee
Ingredients:
14 oz canned condensed milk
1 tablespoon unsalted butter
1/2 cup graham cracker crumbs
3 bananas sliced
juice of 1 lemon
7 oz milk chocolate
10 ml baileys
whipping cream to serve

Make a small hole in the condensed milk can and simmering in low heat for 2 hours until brown. Remove from the pot and cool.

Mix the melted butter and graham cracker crumbs together. Pack it in a 3 inch diameter stainless steel circle.

Place sliced bananas on top and poor in the caramelized milk.

Melt the chocolate with the double boiler technique. Once melted, add the Baileys. Mix well and pack the chocolate mixture on top of the chocolate. Add whipping cream on top and Serve right away.

As I sat back and enjoyed the sweet joyous taste of chocolate with my Christmas tree, I realized that I didn't do any shopping yet. Eeekkkk! =( Oh well eat now, worry later.

Enjoy. =)


Monday, November 26, 2012

Haro Haro!

Sorry, I got a bunch of cheesecake crammed inside my mouth.

Ah, there we go. All gone, hello again and happy black Friday weekend! Shopping this weekend was so chaotic. Everywhere was so crowded and filled with people wanting to get the latest deals on what-so-ever. Anyways, cutting to the chase. It took me two days to make this Cheesecake Factory replica red velvet cheesecake.

Yes, I fell deeply in love after the day of my cousin's birthday party when her mom took out a box of red velvet cheesecake from The Cheesecake Factory. I had to try and bake it myself but I needed some help from people who did this before. Turns out, it's just a very long process that took an extra day to do. No biggie.

I adapted this recipe from cakecentral.com. It was very easy to follow and he tells me that people always ask for seconds once they are done with the first one, so I had to give it a shot.


The smell of fresh moist red velvet cake in the morning is something you simply can't resist. The hint of vanilla and cocoa powder really gives this cake a boost in it's value.


It was such a hassle cutting the cakes in half, especially when the cream cheese part tends to bunch up together. Here's a tip, heat up a sharp knife and run through it quickly but carefully. You don't want to cut yourself and end up adding extra food colour. Haha.


Cake for breakfast anyone? I swear that line came from somewhere, maybe Breakfast at Tiffany's?  Or not Haha.


Sinking my teeth into this soft and flavourful cake was exciting. First I love moist cakes, I am such a sucker for them and with the combination of cheesecake is just to die for. The sweet rich aroma of cream cheese blended with cocoa powder and cream. So smooth!

Here is the recipe


Ingredients
 
Instructions
Cheesecake:
3 8-oz pkgs cream cheese - room temperature
1-1/3 cups sugar
3 Tbs cornstarch
1 Tbs vanilla
3 eggs
2/3 cup heavy cream

Red Velvet Cake
2 Tbs butter - softened
2 Tbs shortening
3/4 cup sugar
1 egg
1 Tbs unsweetened cocoa powder
1 oz red food coloring (a small bottle)
1 cup + 2 Tbs flour
1/2 tsp salt
1/2 cup buttermilk
1/2 tsp baking soda
1-1/2 tsp white vinegar
1/2 tsp vanilla

Cream Cheese Icing
8 oz pkg cream cheese - softened
3-1/2 to 4 cups powdered sugar
1/2 cup butter
1/4 cup heavy cream
1 tsp vanilla
1/4 tsp salt
Spray two 9 round cake pans generously with PAM.
Trace bottoms of pans onto parchment paper, cut out, and place in bottom of pans. Set aside.

For the cheesecake:
Cream together cream cheese, sugar, and cornstarch with mixer.
Add eggs and vanilla - beating until smooth.
Add cream & beat in just until combined - dont overmix.
Pour into one of prepared pans.
Bake at 350 degrees for about 1 hour and 15 minutes - watching closely near end of baking time.

Cool at room temperature, then place in refrigerator for about 2 hours.
Run knife around outer edge, tapping pan to remove cheesecake onto the palm of your hand. Set in refrigerator until cold.

For the cake:
Cream butter, shortening, and sugar.
Add egg, then mix in cocoa and food coloring.
Scrape bowl with a COLORED spatula (red would be best to keep from staining a light colored one).

Add flour and salt, then buttermilk - beating well. Sprinkle baking soda over batter, then pour vinegar and vanilla over the top.

Youll see it foam slightly. Fold into batter until well mixed.

Pour batter into the other prepared pan.
Bake at 350 degrees for about 25-30 minutes, or until it tests done. Cool, then remove cake from pan. Using large serrated knife, cut this layer in half when cold.

For the frosting:
Beat cream cheese and butter together until fluffy. Add sugar and salt, then cream & vanilla. Continue to beat until smooth and it forms peaks. Set aside.

To assemble cake:
Place first half of cake layer onto serving plate (be sure to remove parchment paper from the bottom!) Protect outer edges with waxed paper if desired.

Spread generously with a layer of frosting. Carefully slice cheesecake in half in the same way as the red velvet layer, placing one half on top of red velvet cake & frosting.

Add another layer of frosting. Repeat layers. Spread frosting carefully around outer edge of cake - being careful not to drag red velvet crumbs with the knife.

Now frost top of cake. Using remaining frosting, place in pastry bag with decorative tip. Pipe edge on top and bottom.

*Note: This frosting contains butter, which can soften and melt in your warm hand. Work quickly, or it can make the frosting start to droop. Store in refrigerator & serve with a dollop of whipped cream if desired.


Love the holidays!

Good luck! Have fun with it and try not to break anything in the kitchen. =)
Cheers

Thursday, November 1, 2012

Ever experience a time period in your life where you just don't know what to do? Well, I think I got the right answer for you. Don't let it get to you and just start spending time in the kitchen. It's magical and it works. =)

For the past few weeks, I fell in love with macarons. Why? Because, A: it tastes way too good and you can get so creative with it. B: When you take it out of the oven and see that it is not cracked but in a perfect shell. You just feel this crazy warm and fuzzy sensation in your stomache that makes you want to jump for joy.

So here it is, another addition of macarons. Try to bare with me and not get bored of me just yet. I promise that I will bake something more innovative over the week. =) 


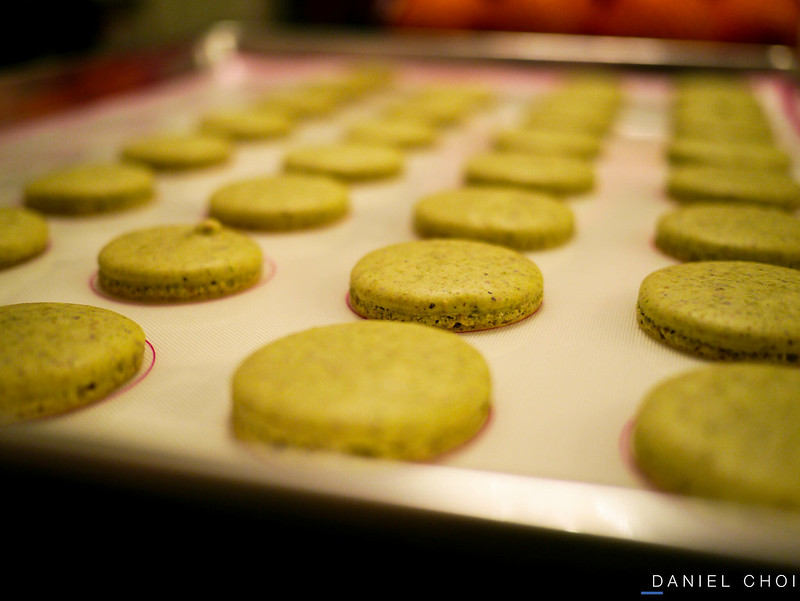
Here are the flawless shells I have been talking about. Later in this post I will share with you on how to bake these flawless shells. You can never go wrong with blue and white. =)


Gah, I need a new piping bag or better piping skills. You see the top of the shell? It has a little "dip" and it's not suppose to be like that, I think it's because I kinda fling it out after I pipe it down. I will make sure I fix this. =)


All packed up and ready to go. Hope you like it! =)

Heres what you need to make this:
 Shell:
75 g ground almonds 
115 g icing sugar 
2 large egg whites 
50g sugar 
food colouring of your choice

Filling:
55g unsalted butter 
115g icing sugar sifted 
2 tablespoons of coffee

Place the ground almonds and icing sugar in a food processor and process for 15 seconds. (Very important part and this will determine the smoothness of the shell)
Sift the mixture into a bowl.
Line baking two baking sheets.

Place the egg whites in a large bowl and whisk until holding soft peaks.
Gradually whisk in the sugar to make a glossy meringue.
Whisk in food colouring of your choice.

Using a spatual, fold the almond mixture into the meringue one third at a time.
Fold until it forms a shiny batter with a ribbon-like consistency.

Pipe the mixture onto the baking sheets. It should make 32 small rounds.
Leave at room temperature for 30 minutes.

Preheat oven to 325F ( I usually do 310F)
Bake for 8-9 minutes. Watch closely and make sure they don't crack.

To make the filling, beat the butter, add sugar and coffee until smooth and creamy.
Now make a sandwich with the macarons and dust it off with icing sugar.

Sunday, October 21, 2012

What a weekend! I am so happy to finally just relax and blog about what I baked over the weekend. It was definitely filled with lots of desserts and festivities that was over top! I am happy to say that I feel I have successfully influenced my cousins to start their own baking adventure or not. They were baking macarons like crazy over the past week just to get it right.

On Saturday, Eric came over and asked if we can bake something simple. I looked at Lillie's blog again and found this peanut chocolate cup that was quite enticing. Cant resist that. You know what they means, off to No Frills! Haha

Heres what you need!
Credit: (http://buttermeupbrooklyn.com/2012/10/mini-chocolate-peanut-butter-cups/)
1 1/3 cups (155 grams) raw blanched peanuts
2 tablespoons (20 grams) powdered sugar
1 tablespoon (15 ml) maple syrup
2 teaspoons (5 ml) honey or agave nectar
1 teaspoon (2.5 ml) vegetable oil
1 teaspoon (2.5 ml) vanilla
1/2 teaspoon (2 grams) salt
1-2 teaspoons water, more as needed
2 cups (about 340 grams or 12 ounces) semisweet chocolate chips
flaky salt for sprinkling, optional


I swear one day, I am going to get a new food processor that has more space. I hate my small food processor, it cant fit anything in it! I think those are my hands, not sure. =\


Next, double boil the chocolate chips. Easy as cake. By this time, I was already eating the chocolate by itself. For some reason, chocolate just speaks to me. Haha.


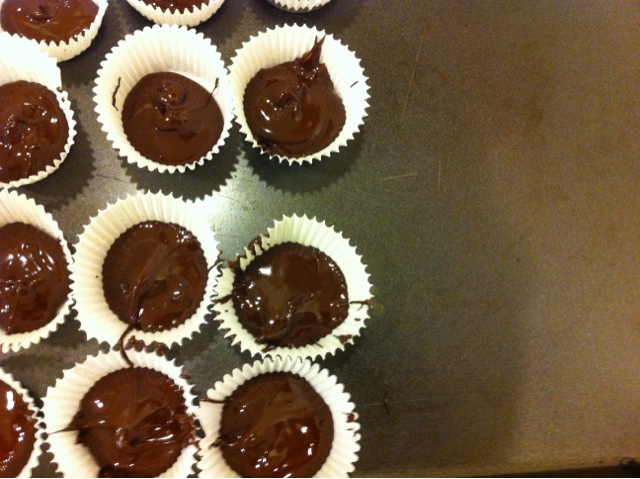
Fill it in cups and make sure the chocolate is touching the walls of the paper cup. Think of it as a well, tall walls with water in the middle. Maybe that was a bad example. Oh well. =)


At long last dig in and share the goods with your loved ones! They will be very impressed and oh yeah, its way better than Reese peanut butter cups. ;)