Twitter Facebook RSS

Sunday, October 28, 2012


I have been meaning to update my blog for a long while but personal business came up and I had to deal with that first. So unprofessional, I know but here I am! And welcome to my utopia. Thankfully, I have the time to finish off the weekend with a nice post.

Sadly, I have been as active as I should but I did mange to spend some time in the kitchen. I baked a Bailey's chocolate cheesecake. I swear one day I am going to invest in a awesome camera but till then you will have to bare with me.

In order to make this cake a little bit more fun and personal. I mixed two recipes together, Jamie Oliver and Anna Olson. The reason being is that, I really love the way Jamie makes his base all you need is:

Base:
9 oz digestive biscuits crushed
11 tablespoons of butter 

Bake for 10 minutes at 350F

Every time I use this base, I get smiles and tears of joy all the time. Its packed with the aroma of butter mixed with freshly baked biscuits (drool).

For the filling:
6 oz semisweet chocolate
3 oz dark chocolate
3 pkg cream cheese
2 cups of sugar
1 cup sour cream 
2 tsp vanilla extract
4 eggs
60 ml baileys 

Olson always taught me that if I wanted to make a recipe more personal, add a little spice. ;) The baileys was seriously a nice kick and added the 18+ to the whole cheesecake experience.  The texture was very smooth, the sugar didn't over power the filling at all but instead the chocolate was very dominant which I loved. I got nothing but good remarks on this cake. Honestly, I was quite scared when it came out because the center was still very "jiggly" and the filling almost topped over the rim of the pan!


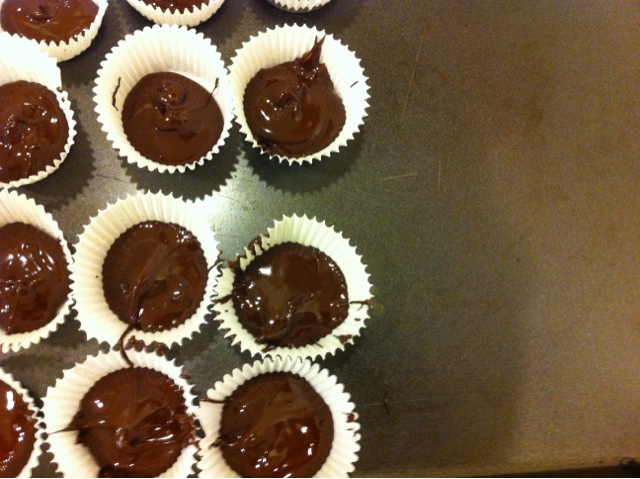
As a bonus, I baked a batch of macarons for the girls of the party. These are always "wow factor" desserts. Every time I bring them out, everyone would crowd around and they'd be gone in less than 60 seconds. I did spot a small error during the process of baking these. For future reference, I highly recommend you to process the icing sugar and ground almonds if you want a smooth and clean shell. Otherwise you will get a bumpy texture which is not pleasing to the eyes at all. Secondly, I tried my best to mix the colour brown but I didn't add enough food colouring and it turned out peachy. =( Which didn't go very well with the coffee cream filling. Blah oh well, now I know.


'Till the day I get a new camera, you guys will have lay your eyes on poorly designed apple cameras. =( Maybe I should have thought of that first instead of buying a new guitar. Oh well. I'll bake it till I make it if that makes any sense.

Keep on coming back for more. =)
P.S. That is my friends Husky. Her name is Holly. Say hi Holly, you are on my blog! =) 

Friday, October 26, 2012


Chinese families love one thing, and that is good company. It was my uncles birthday and we had a big celebration for him, therefore my old man had to do all the cook with some of my help too of course. Now I don't remember all the names he told me but the one above is potato skin with cheese, bacon and sour cream. It was a very simple appetizer but with a big impact. Everyone loved it, especially my grandma.(Who is most important, haha!)


Now this appetizer is a mystery to me, I totally forgot the name of this but I will tell you whats in it. Its basically a spinch dip wrapped with a pastry sheet. Baked for X amount of time. Sorry, I got to stay on top of my foods and names. =(


Next we got mini pulled pork sliders. These were to die for! I love how small it was, it was just the perfect sandwich for a cold winter day or in this case, fall. The pork was pressured cooked until tender, topped with bbq sauce and pickle! So easy and so enticing. Couldn't have just one.


This was one of the newest dish that I have never seen before. Apparently, its like a seafood mixed rice? Let me explain, there were three layers. The bottom layer was rice, second layer was veggies? And the top layer was mussels with cheese. Again something that I have to double check since I only had a little and this was such a new and refreshing dish.


Next you can see the whole fam jam pigging out and if you look closely, you can see my sister in her natural habitat. Eating with and talking with her mouth full. HAHA! Don't tell on me. Enjoy the rest and come back for more! =)

Sunday, October 21, 2012

What a weekend! I am so happy to finally just relax and blog about what I baked over the weekend. It was definitely filled with lots of desserts and festivities that was over top! I am happy to say that I feel I have successfully influenced my cousins to start their own baking adventure or not. They were baking macarons like crazy over the past week just to get it right.

On Saturday, Eric came over and asked if we can bake something simple. I looked at Lillie's blog again and found this peanut chocolate cup that was quite enticing. Cant resist that. You know what they means, off to No Frills! Haha

Heres what you need!
Credit: (http://buttermeupbrooklyn.com/2012/10/mini-chocolate-peanut-butter-cups/)
1 1/3 cups (155 grams) raw blanched peanuts
2 tablespoons (20 grams) powdered sugar
1 tablespoon (15 ml) maple syrup
2 teaspoons (5 ml) honey or agave nectar
1 teaspoon (2.5 ml) vegetable oil
1 teaspoon (2.5 ml) vanilla
1/2 teaspoon (2 grams) salt
1-2 teaspoons water, more as needed
2 cups (about 340 grams or 12 ounces) semisweet chocolate chips
flaky salt for sprinkling, optional


I swear one day, I am going to get a new food processor that has more space. I hate my small food processor, it cant fit anything in it! I think those are my hands, not sure. =\


Next, double boil the chocolate chips. Easy as cake. By this time, I was already eating the chocolate by itself. For some reason, chocolate just speaks to me. Haha.


Fill it in cups and make sure the chocolate is touching the walls of the paper cup. Think of it as a well, tall walls with water in the middle. Maybe that was a bad example. Oh well. =)


At long last dig in and share the goods with your loved ones! They will be very impressed and oh yeah, its way better than Reese peanut butter cups. ;)

Friday, October 19, 2012

Salut!

Salut means hi in French, I think. Haha I kid, of course it does! Yesterday was my cousins birthday and I wanted to show him how much I appreciate him so much by baking him a pumpkin cake, since it's pumpkin season. I got this recipe from buttermeupbrooklyn.com, Lillie was nice enough to share the goods so I'd figure why not give it a try. So let's recap on what this cake is made of:  

One-bowl Pumpkin Cake with Bourbon Sour Cream Glaze Makes one 9-inch tube cake  

For the cake:
one 15-ounce can (about 1 3/4 cups or 425 grams) pure pumpkin purée
2/3 cup (150 grams) Greek yogurt (I used 0%)
2 teaspoons (10 ml) vanilla
2 eggs
3/4 cup (150 grams) sugar
1/4 cup (50 grams) brown sugar, packed
2 tablespoons (30 ml) vegetable oil
2 cups (250 grams) flour
1 tablespoon (12 grams) baking powder
1 teaspoon (4 grams) baking soda
1 teaspoon (2 grams) cinnamon
1 teaspoon (2 grams) ground ginger
1/2 teaspoon (1 gram) ground nutmeg
1/2 teaspoon (2 grams) salt
1/4 teaspoon ground cloves

 For the glaze:
2 tablespoons (28 grams) butter, melted and cooled slightly
1/4 cup (55 grams) sour cream (or Greek yogurt works well too!)
1 cup (115 grams) powdered sugar
1 tablespoon (15 ml) bourbon (or 1 teaspoon vanilla if you are serving this cake to the 21-and-under set)
pinch of salt

Preheat oven to 350. Generously butter and flour a 9-inch springform tube pan (whaaaat is a springform tube pan, you ask? It’s this but if you are without one then a bundt pan works just as well) and set aside.

Combine pumpkin, yogurt, vanilla, eggs, both sugars and oil in a large bowl and whisk for several minutes until smooth. Set a fine mesh strainer over the top of the bowl. Make sure your bowl is high enough so the liquid doesn’t touch the bottom of the strainer. Trust me, I know from experience.

Combine the flour, baking powder, baking soda, salt and spices in the strainer and sift the dry ingredients directly over the pumpkin mixture. Use a spatula to fold the dry ingredients into the wet ingredients. Be careful to not over-mix. Pour the batter into the prepared pan and smooth the top with a spatula.

Bake for 40-45 minutes or until a tester comes out clean. Cool in the pan for 20 minutes, then transfer to wire rack to cool completely.

Meanwhile make the glaze. In a small bowl combine the cooled butter and sour cream until smooth. Stir in powdered sugar, bourbon, and a pinch of salt. The glaze will be thin (and will spread) so pop it in the fridge to help it to firm up a bit while you wait for the cake to cool.

When your cake is completely cool, transfer to a fancy (and rimmed!) serving platter and spread generously with glaze. Serve immediately.


At a glance, I was pretty impressed with all the ingredients and spices. The only thing that caught me a little off guard was the Greek yogurt. I have never heard of it before but Lillie informed me that it is the secret to this cake. The glaze was really easy to make and was such a nice addition to the cake but too bad I couldn't add the bourbon, I had to keep it alcohol friendly since there were kids.


Thursday, October 18, 2012

Hello all!

Question: What happens when you can't afford a store front just yet for your own bake shop?
Answer: You set up shop at home!

Sometimes, just sometimes I wish that I was rich so that I can make my money work for me but then again, money doesn't alwasy mean happiness right? Haha. Right! Anyways, a friend of mine ordered a batch of macarons from me a while back and literally chased me down to get some. So finally, I set a side some time to make these bad boys.

Today's flavour of the week is vanilla, pure and in yet tastey. I enjoyed making them and I hope he enjoyed eating them. Didn't get his honest feedback yet but I will in a bit. Off the heart, let me try to remember how I made them.

Shell:
2 egg whites
125 ml caster sugar
75g ground almonds
185ml icing sugar

Filling:
50g butter
1/2 tsp vanilla extract
185 icing sugar

Baked at 310F for 9 minutes. =)

I always liked seeing them in a tall glass.
We have feet!!! =)
Packed and ready to go!
Story behind this is, after hearing countless radio commericals about Wednesday night's at Milestone. I finally caved in and went for the special. Best place to get yam fries!

When everything fails, just keep calm and spend some time in the kitchen. It works everytime! Next, I am going to make a pumpkin birthday cake for my good cousin Eric.Cook your way to the good life because good good is important! =)

Monday, October 8, 2012

Happy thanksgiving!!!

Today, I had such a relaxing day. It's good to take a break from life once in a while and just catch up with family. I think succeeding at home first out of everything else is always the best mentality. Speaking of which, I do feel guilty for ditching. I was out and I couldn't do anything, I told that person I'd come afterwards but too late. People get mad so easily lol. =( Anyways, just a little rant that I wanted to get out. Other than that, you live and you learn. =)

Today I got the chance to make macarons with bailey's coffee cream flavour. This was the first ever that I wanted to be more bold about the filling. I didn't even think about it, I just added it in and it actually tasted really good. And of course, the orange was because its October! Hehe. The orange was a combination of red and yellow food colouring. I had to add a lot of yellow before it looked anything near orange. Oh well. The cookie itself was pretty straight forward, I blogged it before so you can refer to that.

The filling I have to keep track of it, so here it is:
50 g butter
50 gcream cheese
115g icing sugar
1/2 tsp cinninmon
1 tsp baileys
1 tsp coffee 

And wa la.  Eye candies! Enjoy! =D

Saturday, October 6, 2012

Hello All!

Thanksgiving long weekend! Starting off the week, I had to bake for 80 people. It was a bit different from what I'm used to and it was seriously a big challenge. I wanted to just avoid it but instead I embraced it to the point where I went and got the ingredients myself. I was so scared and unsure about but I thought about all the people I would let down if I gave up. But anyways, I went out and shopped for Tofu cheesecake ingredients! =)

Here's how it goes:
Filling
 16 ounces silken tofu
16 ounces tofu cream cheese
3/4 cup sugar
2 eggs
4 T. grated lemon zest
2 T. fresh lemon juice
1/2 tsp. vanilla extract
2 T. cornstarch

The crust, I used Jamie Oliver's crust which is my favourite! =) It never ever failed on me once. All in all, the seniors loved it but of course, we had left overs. Boo. =(

Monday, October 1, 2012

Yesterday I was inspired.

When I am inspired, I am alive. My cousin was the one who is the wise one here, I went to visit him last night for a trim and we had such a deep and meaning conversation about life in general. It may sound cheesey and non-sense but it inspired me to bake some boozy cookies. I really wanted to try this recipe and finally got a chance to just pick my lazy butt up and do it. Word from the wise: if you're going through hell, keep going. =)

Heres how it went down.
BAILEY'S IRISH CREAM CHOCOLATE CHIP COOKIES 
1/2 c. butter
1/2 c. granulated sugar
1/2 c. brown sugar
1 egg
1 tsp. vanilla
1/2 c. Bailey's original Irish cream
2 1/4 c. cake flour
1/2 tsp. baking soda
1/2 tsp. salt
1 (6 oz.) pkg. semi-sweet chocolate chips

Mix all the wet ingredients together and then add the dry ones. Bake it at 375 for 10 minutes and wala. Boozy cookies! One thing I hate about making cookies is the sticky dough. I hate handling dough but it's essential that you get a good shape for it.

Overall it was chewy, sweet and actaully tastes like Baileys. It was so good. I should really open a bake shop or have a bake sale or something haha.

Enjoy it. =)