Wednesday, January 9, 2013
Macaron Journey
Hello Hello
It brings me great joy to share with you my findings for the week. But I need to come clean and tell you guys that I have been very busy and frustrated for several reasons. First, I was trying to come up with a system to bake macarons and second after trying several times and failing, I was very embarrassed and was about to run a marathon to relieve my stress level. I'm kidding but in all honesty, I was very mad at myself for not getting this down right the first time.
I swear I attempted this 7 times before I learned the main reasons why it wouldn't work. Sometimes, I over folded it and other times, I over whipped it. The thing is I baked it way back before I made a design flip to this blog and never had any troubles until now. My sister blames the temperature and current state of this nasty dry weather we are having in Toronto but I blame the techniques but she could be right.
Thanks to numerous food bloggers such as eatlivetravelwrite, food52 and Lisa from jordanwinery. They have really helped me a lot during this journey of mine by providing tips on what to do and what not to do. Anyways enough with the introduction, I have much to say but I will try to keep it short and simple.
First let's start off with a basic recipe that I have been using. It's from a macaron book my friend got from the U.K.
Meringue Shell:
2 egg whites at room temperture
50 ml sugar
75 ml ground almonds
115 ml icing sugar
a pinch of cream of tartar
Put the ground almonds and icing sugar in a food processor and process it for about 4 seconds 4 times. This will ensure that the ground almonds and icing sugar is at its finest state. This will help your cookie looking smooth and shiny.
Sift the dry ingredients twice and set aside.
Whip the egg whites on high until it starts to foam a bit. Add the cream of tartar and whip it for about 2 minutes. Gradually add the sugar and continue whipping until it forms a soft but stiff peak. You can tell by taking out the whisk and checking the tip of it.
Fold in your desired food colour of choice.
Macaronage Stage:
Take your dry ingredients and add half to the egg whites. Folding ever so gently because you want the egg whites to hold in a bit of air. Fold the rest in and what you want to aim for is a shiny, smooth but not runny texture.
To test if your batter is ready for pipping, spoon some batter on a plate, a peak will form and if it falls back down and melts in with the batter then it is ready.
Piping:
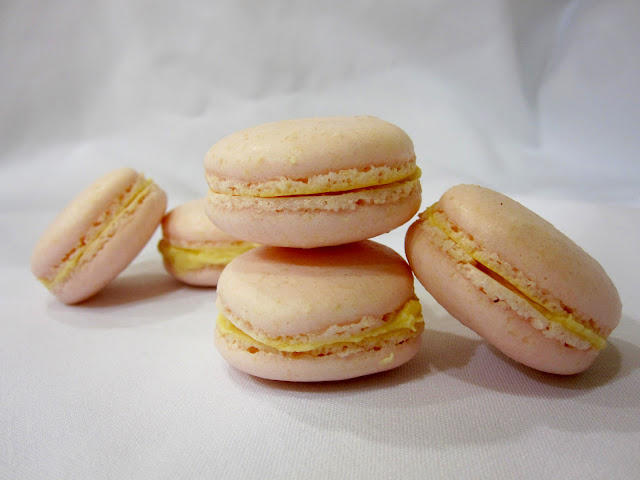
Pipe the macarons on a prepared baking tray with parchment paper already set and cut. This recipe should make 15-16 whole macarons depending on how big you pipe your shells.
Waiting stage:
Let it sit at room temperture for 30-40 minutes. What happens here is it will form a skin on the top of the shell. This will help you form feet at the bottom of your macarons.
At the mean time, set your oven to 325F.
Bake:
Pop it in the oven for 5-8 minutes and watch carefully. For me, it only took 5 minutes and the feet was already formed with no browning at the bottom.
Filling:
50 ml butter
115 ml icing sugar
a splash of vanilla extract
This is one of the most basic fillings there is for the macarons. I just wanted to whip up something quick and end the night.
You can pipe it on the cookie or use a knife and spread a generous amount.
The macarons should be kept in a freezer if not being served. It can be kept in there for up to 3 months. Just take a out and let it sit at room temperture for 20 minutes before serving.
Any questions don't hesitate to message me. =)
Subscribe to:
Post Comments (Atom)
Numbers
-
▼
2013
(16)
- November (1)
- September (1)
- August (2)
- June (1)
- May (1)
- April (2)
- March (2)
- February (4)
- January (2)
-
►
2012
(76)
- December (4)
- November (6)
- October (8)
- September (12)
- August (5)
- July (7)
- June (5)
- May (2)
- April (5)
- March (5)
- February (6)
- January (11)


0 comments:
Post a Comment